
I needed a break from spiking tie plates for my Proto:48 Southern Pacific layout and I wanted a project I could finish in an afternoon. As I looked around the workshop, the big yellow nose on this 7mm (British 0 scale) model of a Class 37 locomotive was like a red flag to a bull. It was time to add DCC and sound to this beast.
I acquired this model as an impulse buy earlier this year. Once it arrived, I went shopping for a suitable decoder and ended up on the DC Kits website. There, I found a Loksound 5 XL with high-bass speaker, preloaded with the appropriate sound package from Legomanbiffo. I had excellent service from DC Kits, which also has a useful guide to wiring this model.
My first challenge was breaking into the unit. I asked about it on RM Web, and learned that the first models had four body screws run through the frame near the truck bolsters. But the story goes they were machine assembled and run in so fast they softened the plastic in the shell, which then shrank around the screws as it cooled. That certainly seemed to be the case because I had to apply scary amounts of force to the screws to remove them.
I managed to get three out successfully – but stripped the head on the fourth and had to drill it out. So… the unit is now held together by three screws. I’m good with that.
Once inside, things got a lot easier.
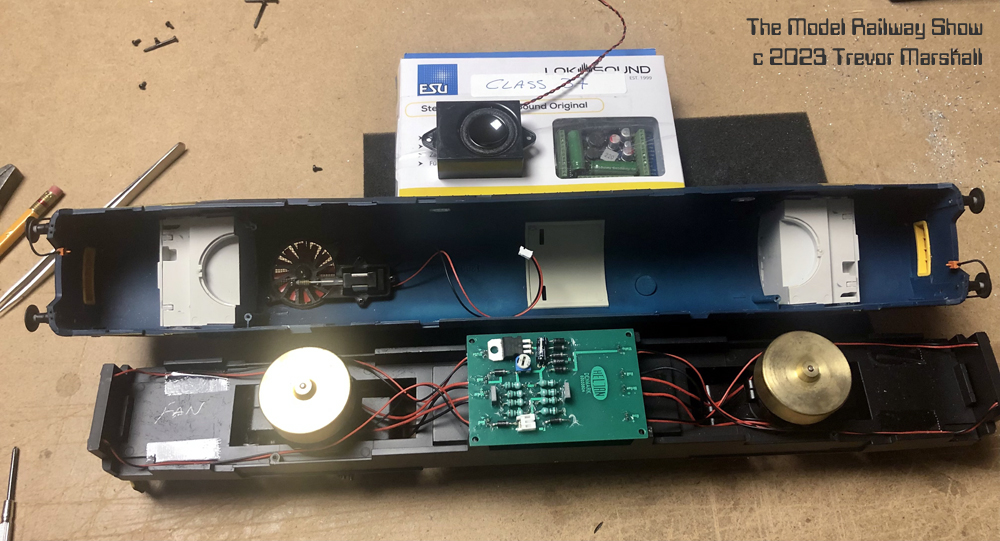
Look at the size of those flywheels! Also, note that the rooftop fan is powered with a small motor. That’s a bit gimicky, but a nice touch.
The Loksound 5 XL is a good choice for this model, as it has the capacity to handle the two large, truck-mounted motors. Heljan’s circuit board made it easier for the factory to assemble this model without having to think about wire colours, etc., but I would not need it for the DCC install so I pulled it.
Removing the board revealed a cavity that would nicely hold the speaker supplied with the decoder. A couple of strips of double-sided foam tape on the bottom of the enclosure secured it in place.

I decided I’d use the four cast-in posts that held Heljan’s circuit board to mount the decoder. This required making a frame. I cut a rectangle from 0.060″ styrene sheet. I added a strip of 0.060″ x 0.250″ styrene along each side to stiffen it as shown in the photos. I also drilled holes for the mounting screws and opened up the middle to clear the electronics on the bottom of the decoder. The decoder is mounted to this frame with a narrow strip of double-sided tape (not the foam type) along each end.

These are great decoders, with a built-in PowerPack (electronic flywheel) and screw terminals for connecting up the various wires. I followed the guidelines from DC Kits and wired up the decoder in about two hours. It was not as easy as screwing all those wires to posts – I had to add more wire to, for example, link each truck’s track feeders and wire the motors in parallel. But it was still remarkably straight-forward.
And here’s the result. In this video, I’ve captured the longer of two start up sequences (in which the prime mover needs some coaxing to life) and the first move…
I’m very pleased with this. It was exactly the project I needed yesterday, and I’m delighted with how it turned out.
This beast needs a place to run… but in the meantime, it’ll join my Gronk on the display shelf.
