
When I work a train on my layout (or anybody else’s layout for that matter), I like to use a switch list – even if car forwarding is managed by a waybill system such as car cards.
I think car cards and waybills are very flexible – more flexible than switch lists – for managing the flow of traffic on a layout. And as I’ve written elsewhere on this site, I developed a set of prototype-inspired waybills for my Port Rowan in 1:64 layout to determine what car needed to go where.
But once I know what work needs to be done, I think switch lists are an elegant way to manage it. As an amateur conductor I find writing out a switch list allows me to organize my thoughts before I pick up the uncoupling tool and start issuing orders to my engineer. As a result, we do our switching more efficiently – and I don’t get lost in the middle of a job, trying to remember my overall plan for the work.
In addition, a switch list allows me to treat my waybills as the accounting documents that they are on the prototype – keeping them safely tucked away in a waybill box or in the caboose. That contributes to my goal of representing the real work that a crew would have performed.
After hosting several operating sessions on Port Rowan, I realized using switch lists is not intuitive when one starts with a stack of waybills – either of the car card variety, or of the prototype style I used. So, here’s an explanation of how I organized the switching work on my layout.
Waybills were kept in three places on the layout. Cars spotted in St. Williams or Port Rowan had a corresponding waybill in the bill box located at those stations:

All other waybills were stored in a card box designed to hold 4″x6″ index cards:
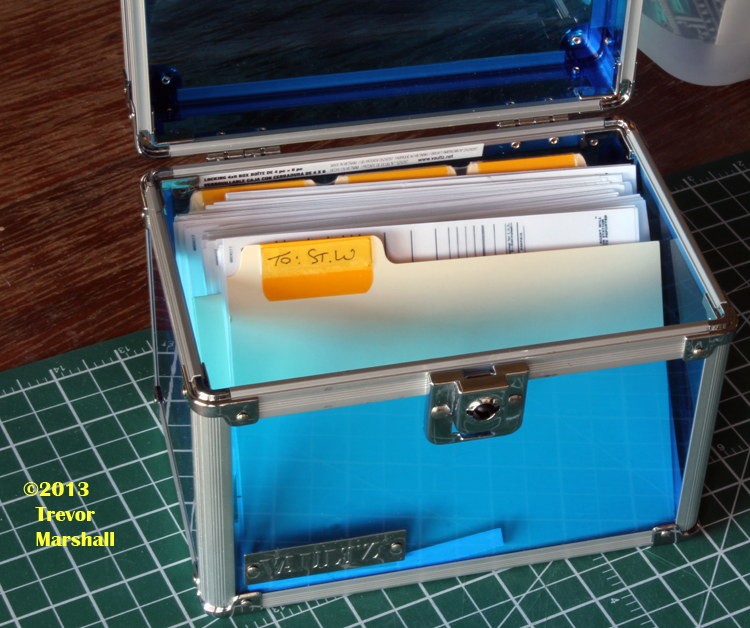
The card box had several labelled dividers to help organize the bills. They were as follows:

In addition, I created a labelled divider for each locomotive on the layout. There were labelled dividers for 80, 86, 908, 1532 and 1560. This allowed me to compile the waybills for each train in staging. Note that it didn’t matter whether the train was running as an extra freight or as the Mixed Train (M233 out of staging): The waybills were organized by locomotive number.
When it was time to run a train, I pulled the waybills from the appropriate locomotive divider and put them on a small clipboard, which represented the Conductor’s Desk in the caboose. I also grab a blank switch list.
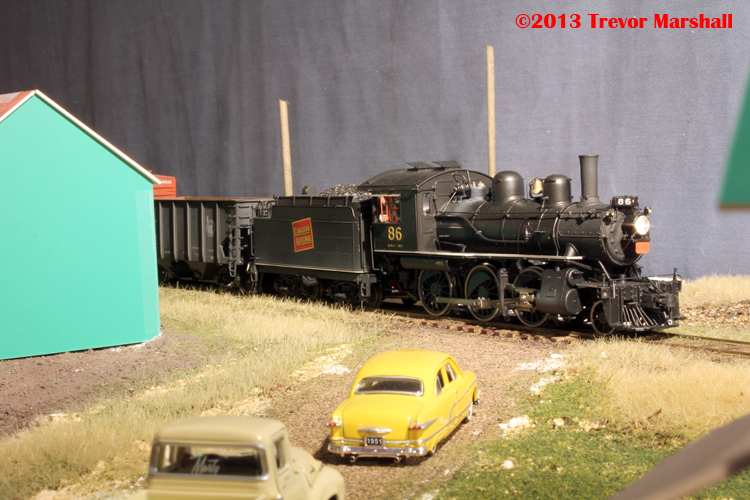
To illustrate how handwritten switch lists work, let’s assume the day’s session involves CNR Mogul 86 on a freight extra:
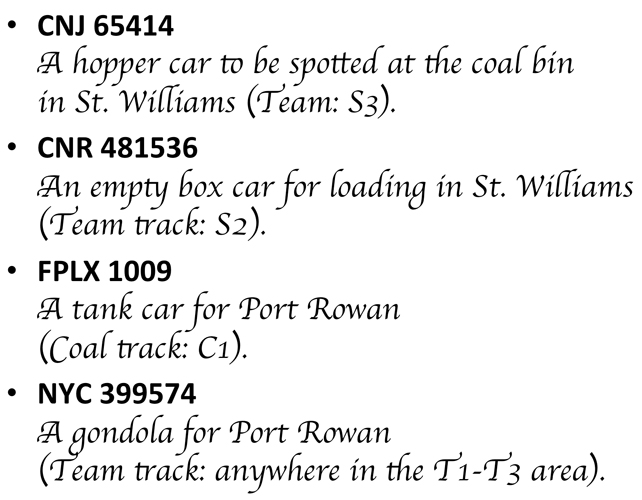
Here are the waybills for the cars in our train as we leave Simcoe (staging), headed for St. Williams:
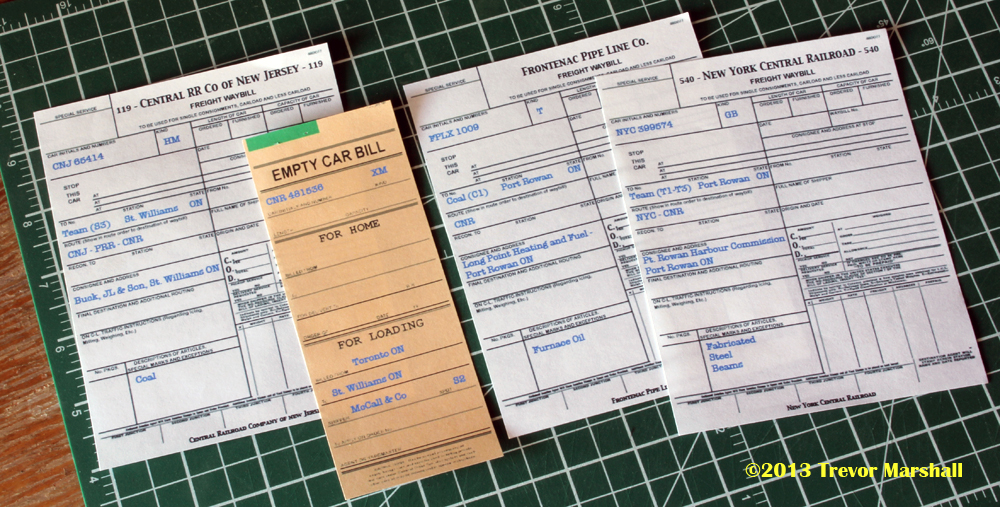
I’ve arranged the waybills in the order that the cars are found in the train, with the front of the train at left. From front to back in the train, we have:
Even before arriving at St. Williams, I can start writing my switch list – listing the cars from top to bottom in the order they appear in the train. Here’s what it looks like:
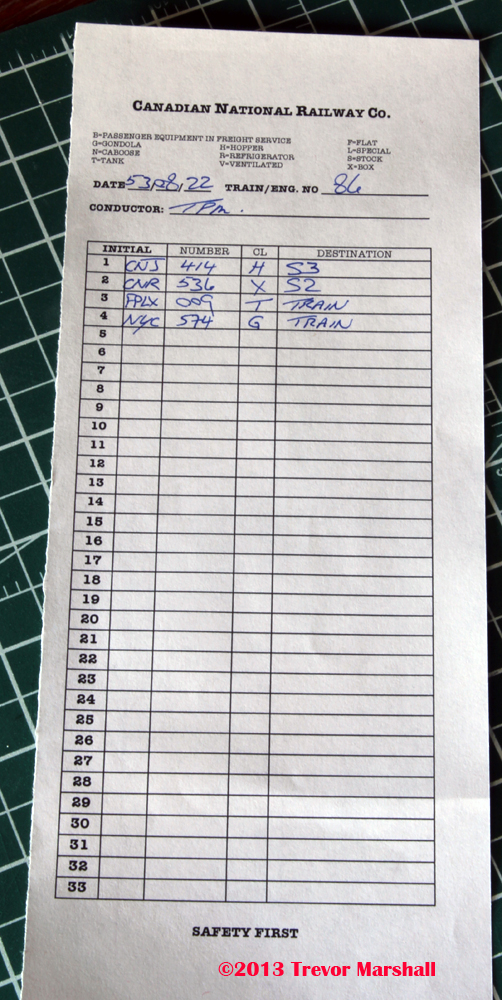
The switch list has space for reporting marks – Initial and Number. Note I’ve only written in the last three digits of the road number. That’s usually sufficient to tell one car from another, and it saves a bit of writing.
“CL” is for “Class”, and the symbols – H for hopper, X for boxcar, T for tank car and G for gondola – help identify the type of car. A list of car classes and appropriate symbols is included at the top of the switch list for handy reference.
The last column is “Destination”. This is simply where the car should end up after the switching is completed. As the photo shows, the CNJ hopper will be spotted at S3 while the CNR boxcar will be spotted at S2. The tank car and gondola will remain in the train.
To help new operators find their way around the layout, I included a track diagram on the back of every switch list form, with the spotting locations clearly indicated:

Once the train arrives at St. Williams, I could unload from the van and visit the depot. Here, I would open the bill box and collect all the paperwork inside, to determine if there are any cars for our train to lift. Here’s what I find in the bill box:
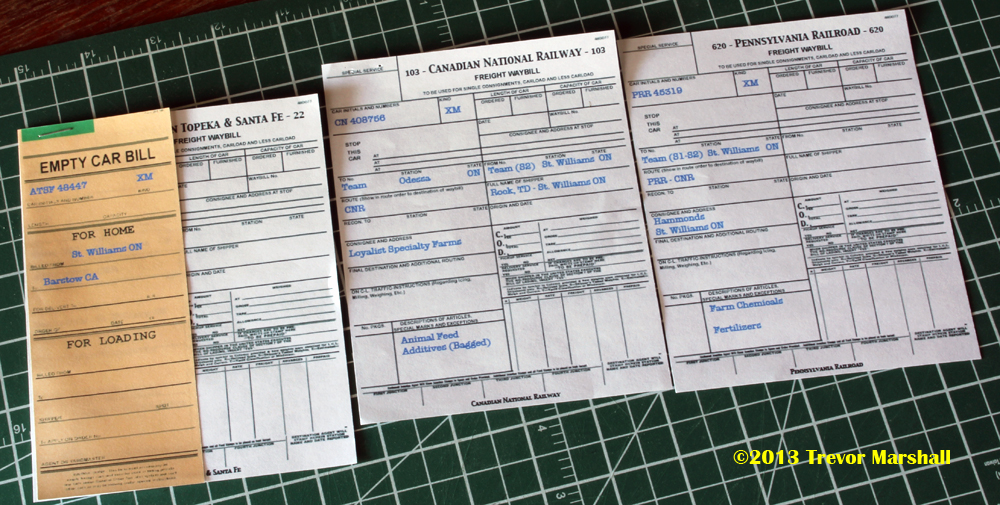
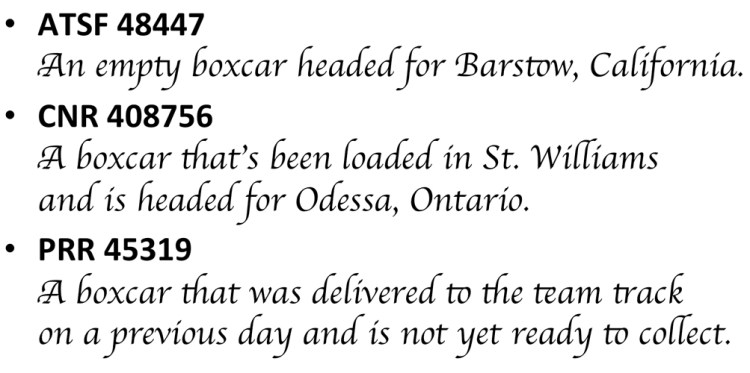
These are in no particular order, but from left to right we have:
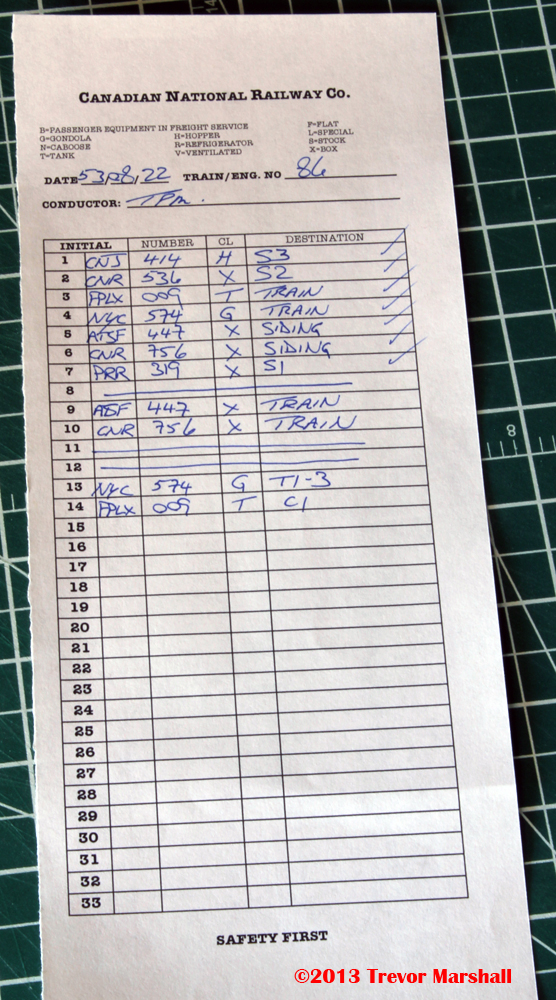
Before we start switching St. Williams, I would add these cars to my switch list:

From the top, we have two cars to spot in St. Williams… two cars staying in the train (headed to Port Rowan)… two cars we are lifting, which we will place on the double-ended siding in St. Williams so we can pick them up on the return trip… and one car that’s staying put (on the Team Track at spot S1). Note that on this list, I don’t care where the cars are now – only where they should be when the switching is done.
Under the first list I have drawn a line then written in two more moves – for the ATSF and CNR boxcars that we will lift from St. Williams. Their destination is “Train” – a reminder that we have to pick these up on the return trip. I’ve drawn another line below these two cars, and now I’m ready to switch St. Williams.
(On more complex layouts, one may have to move a car several times during the course of switching. For example, one may need to pull all the cars at an industry, sort them into lifts and re-spots, set aside the lifts, then sort the set-offs and re-spots into correct spotting order. In this case, one may write two (or more) sets of switching orders. It all comes down to what helps you get the job done.)
Before we start the work, I would return to the depot and deposit the waybills for any cars that are staying in St. Williams – even those that we will pick up on the return trip (in case something happens en route and we don’t get to collect the cars. The waybills always stay with the cars). I will have just two waybills in my caboose (my clipboard) at this point: for the two cars headed to Port Rowan.
Once we have switched St. Williams, I can do a quick review of my list to make sure every car is in the proper spot. I put a check next to each car on the list. This tells me the work is done and we can head to Port Rowan. I also drew a double line under the St. Williams work and wrote up the two cars to be set off in Port Rowan:
I did this check and prep while my engineer conducted a brake test at St. Williams, giving us a head start on the work to do at Port Rowan. Upon arrival there, we would stop at the depot, I would collect the waybills for all cars in Port Rowan, and add them to the switch list – just as I did at St. Williams.
In addition to being more prototypical, I find using a switch list is more practical. Compare the lists – all done on a single piece of paper – to the pile of waybills I would’ve had to juggle to perform this work:
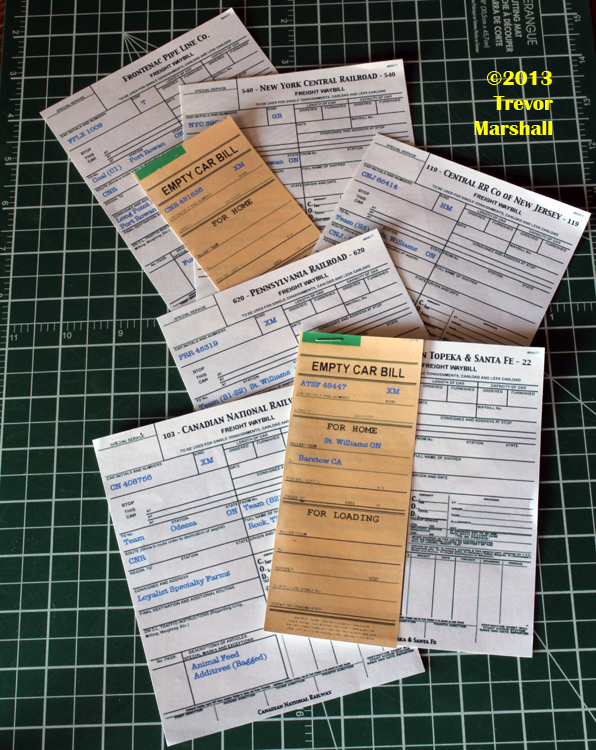
In addition to being quite a stack, there are also several different types of waybills – including white waybills for loaded cars to be delivered… white waybills for loaded cars to be lifted… yellow empty car bills by themselves for empty cars being delivered for loading… and yellow empty car bills stapled to a waybill representing empty cars headed for home.
As a conductor, the switch list puts all of the information I need in one place, where I can see it at a glance. It also allows me to filter out the information I don’t need to know in order to do the work, such as whether a car is loaded or empty.
If you use waybills for car forwarding – either the popular car card variety or something more prototypical, such as I use – and you don’t currently write up your own switch lists, I encourage you to give it a try. It really does make a difference – in so many ways!
(This is an update of a 2013 post from my previous blog about Port Rowan.)
