Almost a month ago I posted about the end of Port Rowan, and about trying to decide how to fill my new layout space. Since nobody has been able to see the space because of the current pandemic, here’s a peak at the room courtesy of the real estate listing…

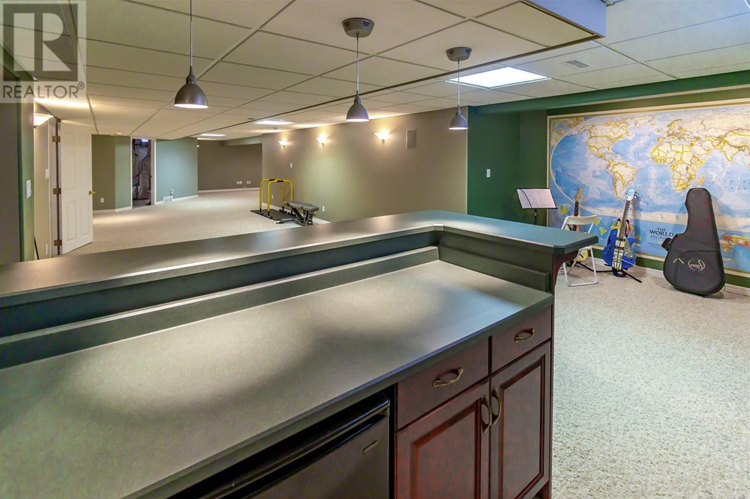
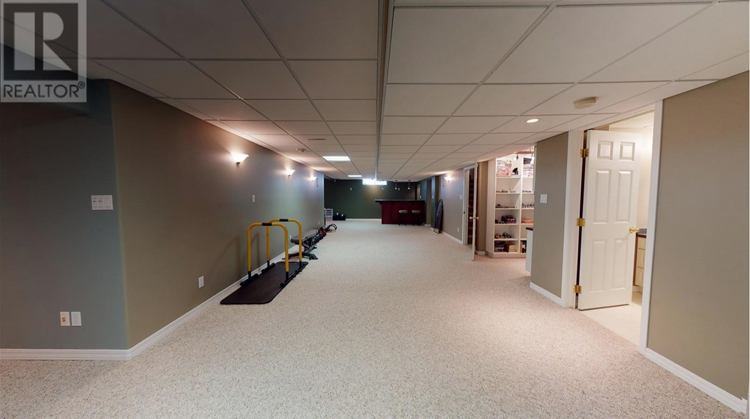
As you can see, it’s a nicely finished space. It’s also larger than my previous space, by about 50%. (The exercise equipment, musical instruments, and mirror are not mine and are all gone.)
Rather than dive into detailed planning, I started with concept sketches. I did this because I want to build a model railway that takes advantage of the space and provides me with new research, modelling, and operating opportunities while still remaining achievable. But a big challenge in determining just what such a layout would look like has been understanding the space itself.
Very early on, I realized that drawing the room, over and over again, would kill any inspiration. Therefore what I did – and there’s nothing revolutionary here – is draw up a crude template on which I could draw concept sketches. I did this on quarter-inch graph paper, to the relatively small scale of “one square equals one foot”. Even so, I had to scan the room drawing in two halves and then stitch them together in PhotoShop. While I was there, I added a few labels.
The first sketch looked like this:
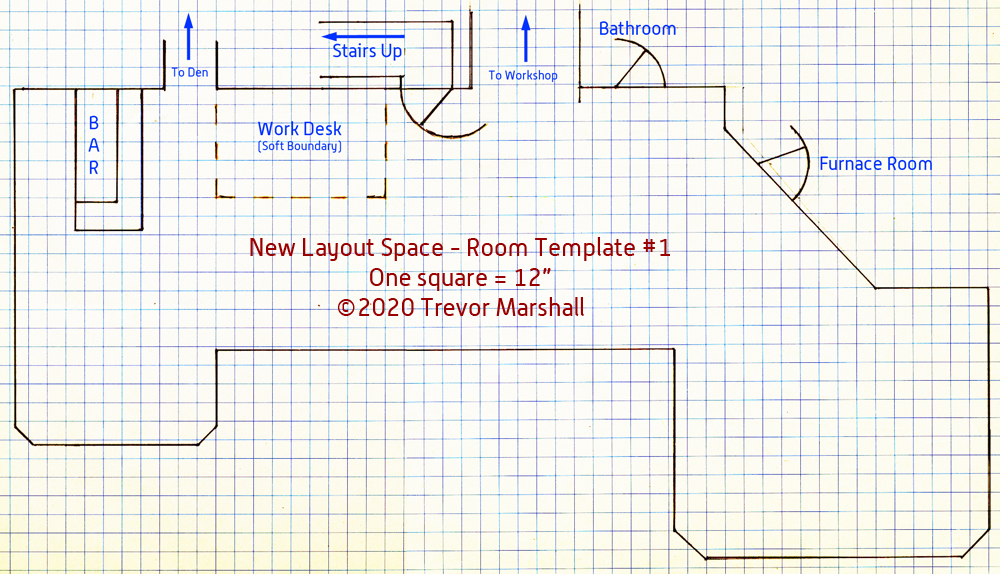
This one features the current location of my work desk (where I’m sitting as I type this). While leaving both blobs in the lower corners free seemed the obvious choice for turn back curves, I found that in the larger scales I prefer such as S and O that blob in the lower left proved problematic. A turn back loop would take up most of that space and still come too close to the bar.
As well, there’s a large map in that alcove, permanently glued to the wall and with its own lighting.
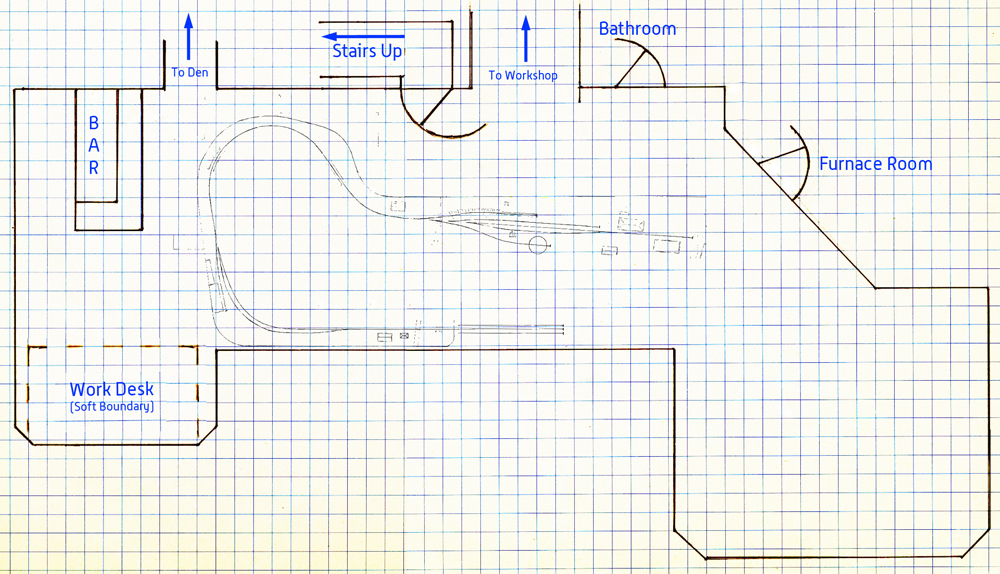
Having decided that I like the bar and the map and that they both would stay, I modified the sketch somewhat as seen here:

This collects all the non-layout uses of the space down at the left end and moves my work space out of the layout room into its own area: When, eventually, I can have guests over I will be able to control access to that space, which is a good thing.
I like this arrangement much better as it opens up the middle of the room to more possibilities.
As a fun exercise, I scaled a drawing of my Port Rowan layout to match the scale of this new space. It gives me a real appreciation of the difference:
I printed out a bunch of room templates – usually a half-dozen at a time – and had the printer resize them automatically to fit on a single sheet of paper. In the end, this resulted in squares of approximately 3/16″.
Some may question whether that’s too small to do any good. And they would be right if I was trying to develop a final layout plan, ready for me to start building. But at this point, what I was most concerned with was broad brush strokes. I was answering questions like, “Can I fit a 60″ radius turn back loop in this space, or is 48″ radius the broadest I can go?” and “Can I put a peninsula up the middle of the room?” Once I determined that, I would be able to design plans in more detail.
My approach was inspired by, but different from, that used by the dean of layout design, the late John Armstrong. He used a technique he called designing “by the squares”. Briefly, his square was not a set size: it was the size that a quarter-circle of double track would fit into, at a radius determined by the equipment the plan was designed to run. (It’s an elegant solution but one I always had trouble using for my own designs – which is not a failure of the solution but of my ability to apply it.)
It’s one thing to look at photos or a room drawing: It’s quite another to understand what will fit, how people would interact with the space and with the the layout, and so on. When a space is large or unusually shaped, the challenges compound themselves and understanding is more important than ever.
I’ve drawn a few dozen concept sketches using both variants of the room arrangement and while most of them were awful, some are quite promising. I think I’ve now settled on a plan – at least, settled enough that I can break out the drafting gear and design something at a larger, more useful scale such as 1/2″ or 3/4″ to the foot.
But that’s a post for another day…
