In a previous post, I presented a couple of unusual views of Bydemill – my 7mm scale, Edwardian-era, Great Western Railway layout. They are instructive from a design perspective, but do not convey a sense of what people see when they’re visiting the layout. Let’s look at that perspective now…
First impressions:
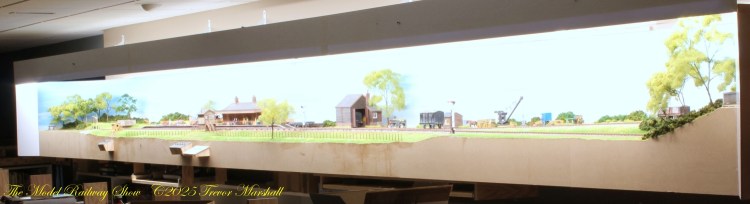
Bydemill is a shelf layout measuring 2′ x 24′ (plus staging). It’s hung on the wall directly across from the entranceway to my basement layout space. For now, visitors can take in the entire layout as they enter the room, as shown above. Eventually, the final phase of my S scale Niagara St. Catharines & Toronto Railway layout will run up the middle of this room on a peninsula, blocking this view. I have not yet chosen a fascia colour but it will be something dark – perhaps the dark green the GWR used on its locomotives.
Looking north:
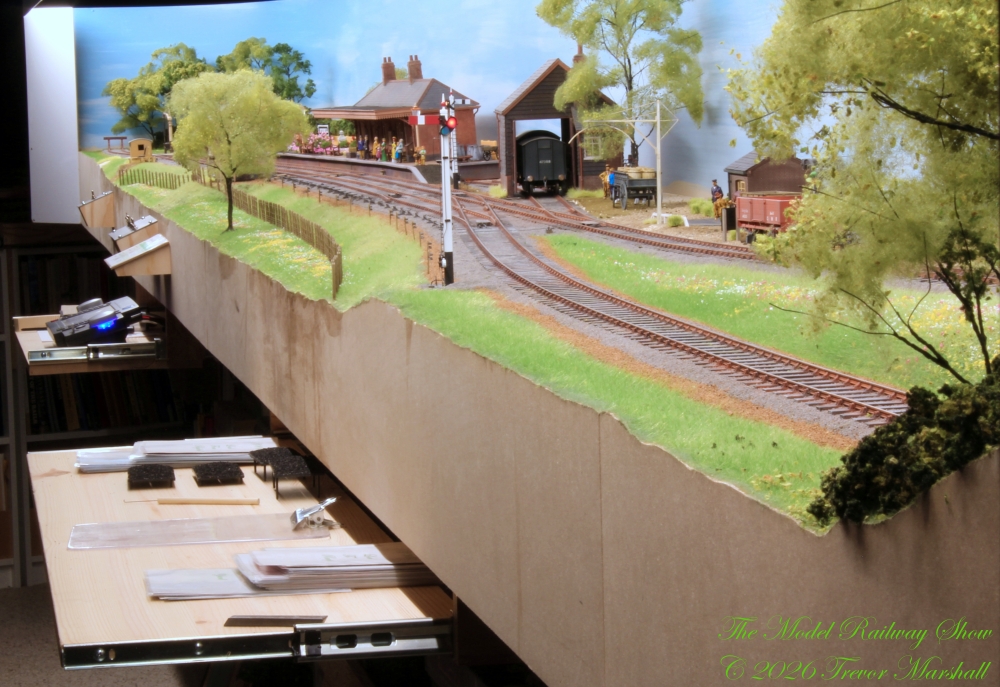
Once that NS&T peninsula is in place, this is the view that will greet visitors to Bydemill. It’s looking north from the staging area (out of sight to the right). The main track ascends into the terminal, with the goods yard, goods shed, and station spread along the backdrop. Two slide-out shelves hold the DCC system, tools, and paperwork – while still providing plenty of space for operators to organize their work.
Looking south:
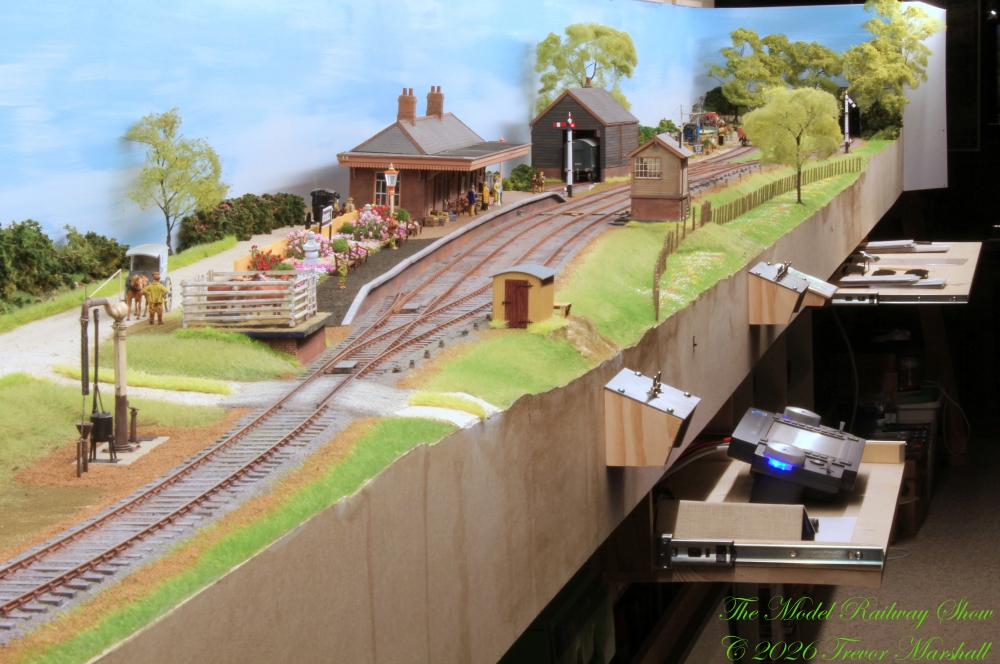
Looking back from the far end of the aisle, the curve of the platform track and loop track really become apparent. This perspective also brings the water crane, cattle dock, station garden, and signal box into focus. Note how the goods shed, signal box, and single foreground tree – sited so as to not interfere with operators as they reach in to the layout to couple or uncouple wagons – effectively turn this single modelled location into two distinct scenes.
Including a generously proportioned aisle and the removable staging area, Bydemill occupies roughly 5′ x 32′. That’s a large layout by UK standards, but not enormous by North American measures – especially when working in 0 scale. What’s more, the layout floats over a 24′ long solid block of bookcases, providing plenty of useful, accessible storage underneath – including for books!
Within that footprint, I resisted the urge to add more switches to increase complexity. Bydemill has just four switches (plus two catch points) and a pair of simple signals. Yet, is provides operators with plenty of challenge. Conventional wisdom suggests more trackage is better – but when a plan is pared down to the minimum, every track that remains becomes vitally important. Operators must plan ahead to avoid boxing themselves in, and having to undo the work they’ve already done.
Similarly, I largely resisted the urge to add more density to Highworth – the prototype location on which Bydemill is based. The most significant addition is the stand-alone signal box (which was generously donated to me by a friend and deserved a place on the layout). Beyond that, I upgraded the goods yard with a scale and scale house for weighing horse drawn wagons plus a 5-ton crane. And I enhanced the tail track with a water column for replenishing locomotives. Each occupies a small footprint, yet adds character and context to the layout.
